Provider/Nurse documents the IUD in the Implant Hx.
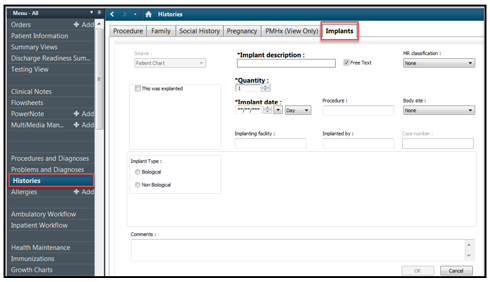
Navigate to the Histories section under the Menu, then over to the Implants Tab.

To Manually Add Historical Implant Information
- Click Histories from left Table of Contents
- Select the Implants tab
- Click Add

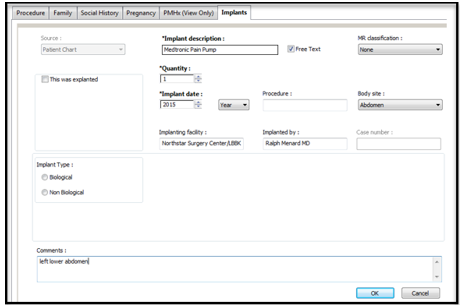
4. Manually enter all required informatin and any other known information then click the OK button

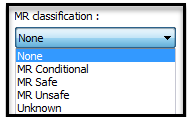
MR Classification field is the MRI Classifications. Some implants may pose a risk in the MRI environment causing the device to malfunction.

- MR Safe- an item that poses no known hazards in all MRI environments; non-conducting, non-metallic, non-magnetic items
- MR Conditional- an item that has been demonstrated to pose no known hazards in a speficied MR environment with specified conditions to use
- MR Unsafe- items that pose a hazard to all MRI environments; inclue magnetic items
Final View

Explanting Devices
When an item is explanted, simply right click over the item and chose Mark as Explanted then fill in the date and explant reason then click OK.

Adjusting Implant Columns
Users might like to see additional columns.
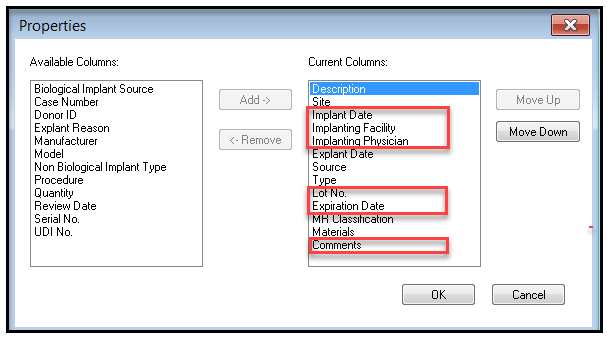
5. Right click over the column name "Description" and click Properties
6. Click the columns you want to see and click Add which will move the filters to the right side
a. The recommendation is to add: Implant Date, Implanting Facility, Implanting Physician, Lot No.,
Expiration Date, and Comments
b. Highlight the Filter to adjust the order of the olumns, the recommended order is seen in the
screenshots below.
7. Click OK to exit the Properties window

